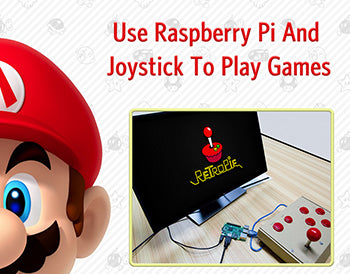
Easily Use Raspberry Pi To Play Games on RetroPie
| Wayne Chen
Gameboys is a memory of many people's childhood, but now due to the emergence of smartphones and iPad, these games are getting farther and farther away from us. Now let's use the Raspberry Pi to make retro game on RetroPie that uses joystick control.
Material Lists:
Raspberry PI Arcade Game Joystick Single Set x1
SD card x2
Raspberry Pi Power wire x1
USB wire x1
Paper box x1
Installing RetroPie from Image
1. The first thing we need to do is to obtain a copy of the RetroPie image for the Raspberry Pi.You can find the available pre-built RetroPie images from the official website https://retropie.org.uk/download/.
On this page, you should see the latest available release with a few download links near the bottom of the page. You will need to select the right image for your Raspberry Pi.
If you are using a Raspberry Pi 1 or a Raspberry Pi Zero, then download the 'retropie-4.4-rpi1_zero.img.gz' file.
If you are using a Raspberry Pi 2/3 or newer, then download the 'retropie-4.4-rpi2_rpi3.img.gz' file.
This image is a pre-built version of Raspbian Stretch with RetroPie already set up on it,whichis one of the easiest ways to get the emulators running on your Raspberry Pi quickly.
If you would prefer you can setup RetroPie on your current installation, but we will go into those steps in another section.
2. After we get the RetroPie image, the next step is to write the image on an SD Card working with the Raspberry Pi.
To do this, a tool called 'Win32 Disk Imager' will be needed. This tool will format the SD card and write the RetroPie image to it.
You can download 'Win32 Disk Imager' via 'https://sourceforge.net/projects/win32diskimager/files/latest/download?source=navbar'
Once downloaded, install, and open the 'Win32 Disk Imager' software.
3. Open the 'Win32 Disk Imager' software, insert the SD card into your computer, you can now start the process of writing the RetroPie image to it.
To begin this process by clicking on the icon that the arrow points to. In the dialog box that appears, find and select the RetroPie image that you previously downloaded.
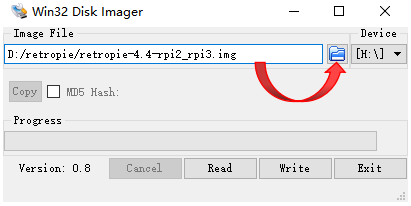
4. After selecting the RetroPie image, click the options under 'Device'. Select the drive that you would like to write the RetroPie image.Make sure the one you choose is, your SD card as it will erase all data on that drive.
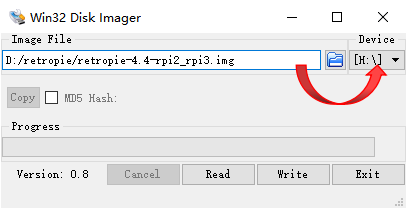
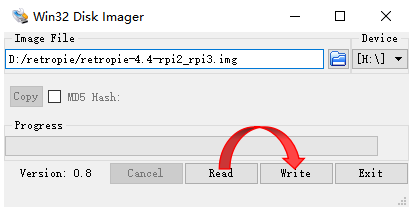
5. Now with the right image selected and the correct drive selected, you can proceed to flash the SD Card by clicking the 'Write' button.
Connecting the Raspberry Pi joystick
-
What I want to do is to make A nintendo console, so I need one joystick and six buttons, which are 'SELECT,START,X,Y,A,B'.
-
Connecting these keys is very simple.There are two metal joints on each key and eight joints on the rocker.Connect the matching wires to the street.
-
Connect the other end of the wire to the drive board of the key.As keys are also set in the system, there is no need for the order of pipe wiring. Therefore, K1 on the drive board can be connected successively.
-
Finally, connect the usb cable from the drive board to the usb port of Raspberry Pi, and the key wiring is completed.
Copying ROMs from a USB Drive
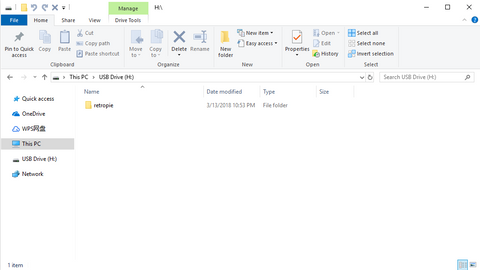
1. Firstly, we need to ensure that the USB drive that you want to use is formatted to the FAT32 format.
You can check this on Windows by right-clicking on the drive, clicking 'Properties' and looking at the text next to 'File System'.

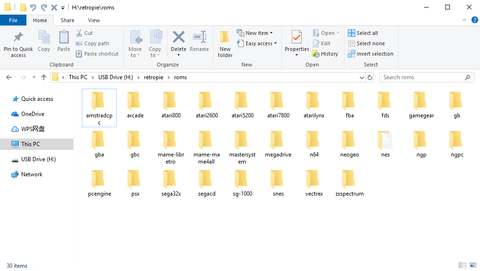
2. On the USB, create a directory called 'retropie'.The RetroPie USB Rom service software will detect this folder when the USB is inserted in and will prepare the directory for copying over ROMS by creating several folders within it.
3. Now insert the USB into the Raspberry Pi, give this a few minutes as the Raspberry Pi RetroPie software will be setting it up in preparation for copying over ROMS.
If your USB has a flashing light, wait until it has stopped flashing before you pull it out.
If it doesn’t have a light, then wait a few minutes unit it is done.
4. Now pull out the USB from the Raspberry Pi and insert it back into the computer.
5. Add the ROMS to their respective folders on the USB.
These folders will be in the retropie/roms folder. (Eg. retropie/roms/snes)
We will show a screenshot of what the folder layout should look like after the RetroPie software has created all the needed folders below.
6. Once you have finished copying your ROMs to the USB, insert it back into the Raspberry Pi.
The RetroPie software will immediately start copying these files off of the USB drive. Don’t take out your USB as this process can take a long time.
7. Refresh EmulationStation by pressing F4, or choosing 'quit' from the start menu.
Configuring Joystick
1. After all devices are connected, turn on the Raspberry Pi.On first boot your filesystem will be expanded automatically, you will then be welcomed with the following screen- this menu will configure your controls for both Emulationstation and RetroArch Emulators:
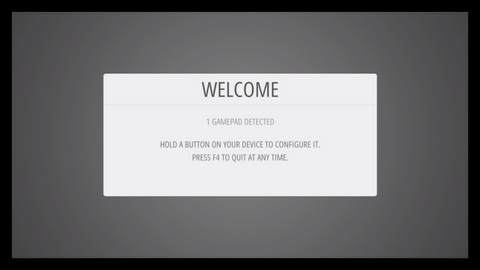
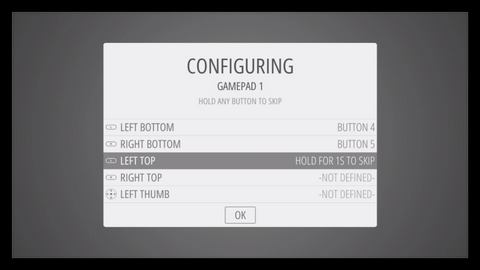
2. Press any button on your keyboard or gamepad and the name will appear at the bottom and then open up into a configuration menu:
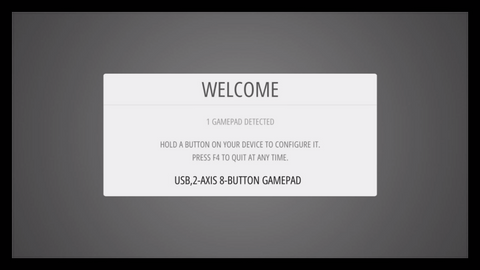
3. Follow the onscreen instructions to configure your gamepad if you run out of buttons just hold down a button to skip each unused button. When you get to OK press the button you have configured as 'A'.
Please note 'hotkeys':
The Hotkey button enables you to press it in combination with another button to access functions such as saving, loading, and exiting emulators. It is suggested to use the Select button as the hotkey. The following chart shows the default hotkey combinations. For example, if you chose Select as your Hotkey, that means you hold down Select while pressing the other button to execute the command. Note Hotkey combinations are specific to the retroarch/libretro based emulators.
|
Hotkey Combination |
Action |
|
Hotkey+Start |
Exit |
|
Hotkey+Right Shoulder |
Save |
|
Hotkey+Left Shoulder |
Load |
|
Hotkey+Right |
Input State Slot Increase |
|
Hotkey+Left |
Input State Slot Decrease |
|
Hotkey+X |
RGUI Menu |
|
Hotkey+B |
Reset |
373 comments to
музыка онлайн
слушать музыку онлайн бесплатно
https://www.sxn.io/
Hi, here on the forum guys advised a cool Dating site, be sure to register – you will not REGRET it https://bit.ly/3kZUqMg
CyutiIBlEzUFdqc